Monday, September 30, 2013

Post Flyball Recovery

We've been off at a flyball tournament all weekend. It normally takes me a few days to recover (or almost two weeks for my voice to recover). The dogs, of course, are ready to go again after a good night's sleep.

Train Tracks-9527

Train Tracks-9533

Train Tracks-9525

Train Tracks-9514

Train Tracks-9526

Saturday, September 28, 2013

Fall Photo Shoot

I decided to do a quick fall photo shoot this past week. Its a bit early for it, since most of the leaves haven't changed yet. But, here in Oregon the leaves tend to change gradually rather than all at once like they do back east. It means we don't get quite the same set up for amazing fall photos as they do.

Train Tracks-9494
Pallo has on his Halloween collar already.

I also just really didn't want to miss out on getting some good fall pictures this year like I have pretty much every other year so far. I figure I can always go back out and get more photos later, but at least I have these ones for right now.

Train Tracks-9500
Koira was just wearing her tag keeper and her tags from GooseyChicken

These train tracks run pretty near where we live, so it was pretty easy to take a walk with the dogs down there. A few cookies bribed them into posing for me.

Train Tracks-9510
This way and that way

Add a second dog to the picture and it becomes that much harder to pose. This was actually surprisingly easy. Both dogs have done perch work in their body awareness training, so they are pretty good at getting those front feet up on something. And once the feet up are, it is much easier to keep the dogs in place.

Train Tracks-9516
I think this is my favorite photo from the entire day, even if neither of them is looking at the camera

Overall, I am thrilled with how these photos turned out. The colors look very fall, even though most of the trees haven't changed. And the lighting was amazing, with nice bright overcast skies. The sun kept peeking through a bit, and the rain kept falling a bit, but it all ended up working out for the best I think.

Train Tracks-9535
Checking out the sounds of squirrels

The only thing I might wish for would be a sky that isn't just a total wash of white. And I know there are ways to put in cloud overlays and such by editing the photo and doing photoshop stuff too it. I'm really not that motivated. For the most part, I prefer a nice clean edit of the style that I can get just in Lightroom, so I have never really used Photoshop, which means I also don't really know how to use it.

Train Tracks-9508

In any case, I am thrilled with how these photos turned out. I actually like them enough that I am thinking of trying a four seasons series of photos in this location, with fall, winter (if we get snow this year), spring, and summer. We'll see if I end up with the motivation and memory that it takes to do something like that!


Friday, September 27, 2013

Fall in Oregon

Fall in Oregon is officially here. And that means rain. Lots and lots of rain.

I actually really enjoy the rain. I was born here in Western Oregon and grew up with 9 months of rain every year. The summer is hot and dry, which can be fun, but I absolutely love Oregon fall and winter.

That said, the rain is something you have to learn how to deal with. I have two pairs of waterproof boots (the comfortable neoprene kind) which are great for keeping your feet dry when slogging through puddles and wet grass. I also just added a pair of slip on waterproof shoes, which should be faster and easier to get on for quick walks with the dogs. I'm also hoping they won't make my feet get as hot as the big heavy boots can in warm wet weather.


Train Tracks-9541
First walk with the new shoes

Of course the first time I wore them they got totally covered in dog hair. Fair warning for anything in my house, really.

Train Tracks-9543
Super cute blue shoes with pawprints and extra dog hair

I also added a golf umbrella to my collection of winter walking gear this year. I'm not too worried about me staying dry (I'm an Oregonian after all), but the huge umbrella might make it safe for me to bring my camera along on what might otherwise be a soggy walk.

Another tip for walking dogs in rainy weather is to spray down jackets with waterproofing spray at the beginning of the rainy season. Focus especially on seams, shoulder area, and the hood for best protection from the rain. I've even been known to spray down my sweatshirts with waterproofing spray! I also spray down the dog jackets as well, after giving them a thorough wash, of course.

You can also see in the above photo the new fake grass in my entryway. I have a covered entryway between the yard and the door. I picked up this fake grass to line the entry. It will help clean off dog paws when they go in and out of the house. I picked up a 8x6 roll of it for $20 and cut it in half. I'll use the other half to replace the one currently down if it gets too gross. 

Of course, I also have a huge collection of dog towels. I found towels for a dollar each and stocked up on white, brown, and blue ones to use specifically for the dogs. I keep some in my car and next to the front door to dry off dog feet, bellies, and backs.

How do you deal with the rain?


Thursday, September 26, 2013

Product Review: Dog Tags

I was super happy to work with Sharon from GooseyChicken, a pet ID shop on Etsy. Her tags are beautiful and really well made.

Koira was sent this tag with her name, my phone number, and an awesome foxy fox charm to review.

Tag-9479
The tag up close

The tag itself is three layers. The bottom layer is the large silver colored disc of aluminum. The aluminum is super lightweight but seems pretty sturdy. My phone number is stamped into this layer. With it being stamped in, I know that as long as this tag is still attached, my phone number will stay visible. Anodized aluminum is the second disc. I chose a fun pink for Koira, and had her name printed on this disc. The top layer is the fox charm, which is just adorable.

Tag-9476
Up close on Koira, with the tag on the tag-keeper

The whole thing is put together on a tiny stainless steel ring. The different discs move around (so my phone number is fully readable in person, don't worry!). I have found that even though they move, the lightweight aluminum doesn't make much noise, so I don't have to put up with any of that annoying clinking sound of dog tags.

Now, since Koira does have her issues with metal, she doesn't wear this all the time. I actually got some leather cording and made a tag-keeper collar for her out of a four strand leather braid (the same method I used to make tug toys, in fact). Then I slipped the ID tag on there. The tag-keeper slips on over Koira's head, and I can put it on her when I know we are heading out of the house.

Tag-9477
Koira doesn't mind wearing it at all, and so far, no metal allergy reaction to the aluminum (yay!)

Overall, I was really happy with this tag. I was initially surprised by how lightweight it was when I got it in the mail, but I ended up really liking the lack of clinking with the light aluminum. The tag also seems very sturdy. So far, there is no denting or chipping of any kind on the tag. The stamped numbers and letters should last as long as the tag itself stays intact. And the fox charm just makes it a cute, unique tag. Best of all, these tags are very affordable at $15. And, Sharon is even running a special on her Etsy shop right now- buy two tags and get the third one for free! That is an amazing deal if you have multiple pets or even if you want to order a charm for yourself.

*I received a free dog tag in exchange for an honest review post. I was not compensated in any other way and was not required to give a positive review. All thoughts and opinions expressed here are entirely my own.

Tuesday, September 24, 2013

Supper Time

This is about what supper time looks like at our house. Not pictured is the cats' bowl with their own chunk of meat.

Last night, everyone got some nice free range, grass fed beef.


Food-9482


Typically of Pallo lately, he refused to eat it. I did win a couple of large bags of high grade kibble at our flyball tournament raffle last weekend, so he got some of that instead. He's been eating kibble the past week since we won those, but I wanted to try him on raw again to see if he would eat it. Nope. Koira and the cats don't have any such issues, though!

Monday, September 23, 2013

Chicken Swap!

Chicken Swap-9432


On Saturday, I had to meet up with a friend of mine who agreed to transport my old flyball box to its new owner on the other side of the mountains. She had to be in town anyway, and when I heard what she was in town for, I had to go too. So Saturday afternoon, I headed straight from work over to the fairgrounds and the Chicken Swap.

There were a ton of chicks and even some ducklings there for sale.

Chicken Swap-9402
Ducklings

Chicken Swap-9410
Chicks

Chicken Swap-9408
Yellow chicks

Chicken Swap-9411
More chicks

I don't know a whole lot about chickens other than the basics. I know there are a ton of different breeds, though, and some of them are downright funny looking.

Chicken Swap-9415
A chicken with an afro

Chicken Swap-9445
And a chicken with a full body afro

Most of them didn't seem to mind being in this huge building with a ton of people and other animals, but some of them did look a bit disgruntled by it all.

Chicken Swap-9449
Quizzical chicken

Chicken Swap-9468
This one was at an awkward growth stage

These two guys, though, were just hanging out on their person's shoulders, which was adorable.

Chicken Swap-9439
Oh hi

Chicken Swap-9440
Shy white chicken on the other shoulder

There were also booths of chicken related stuff without any chickens as well, such as these awesome chicken signs.

Chicken Swap-9442
Beware of free range cock

Chicken Swap-9441
Wicked chickens lay deviled eggs

And some fleece too.

Chicken Swap-9405
Lots of pretty colors

There were, of course, also geese there. I shared a photo of one goose yesterday (and no, that one didn't try to bite me, thankfully). I did get hissed at by one of the other geese though.

Chicken Swap-9458
A mohawk and pretty blue eyes

Chicken Swap-9455
This one had pretty blue eyes and super ruffly feathers

Chicken Swap-9456
And a bad attitude. Hissing geese are way scarier than you might expect

Chicken Swap-9474
This guy was totally chill, though.

And while I was told by people in the know that last year, the event was exclusively poultry and mostly all chickens, this year they had chickens, geese, ducks, rabbits, donkeys, and pigs. One booth even had a livestock guardian dog for sale.

Chicken Swap-9465
Feeding time for the piglets

Chicken Swap-9460
Harlequin rabbit

Overall, it was a pretty entertaining day. It was so hard for me to not come home with the harlequin rabbit (above). Or any chickens. But, I managed to come home with nothing but pictures, and minus a flyball box.

Saturday, September 21, 2013

Some Flyball Pictures

I just bought some of the pictures of my dogs from the past three tournaments. I've been meaning to get some for a while, and I finally took the plunge and bought them. Two of the tournaments were on dirt and one was on mats, so you'll see some of both. Flyball is such a big part of our lives, and yet I almost never have pictures of my dogs doing it. I am always too busy running them and not able to take pictures. It is awesome when other people get great pictures of my dogs!

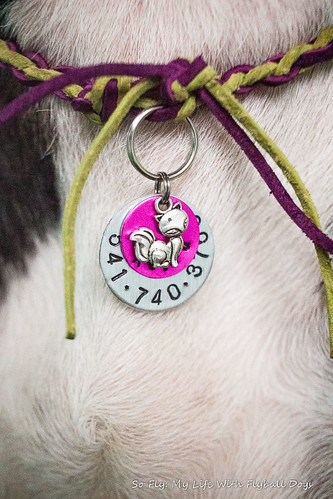
*Oh, and I didn't mention on Monday in my tournament recap (because I didn't know yet at the time) that Koira achieved her next title at the tournament last weekend. She now officially has the Flyball Dog Champion Gold (FDCh-G) title. Next up, Flyball Master!*

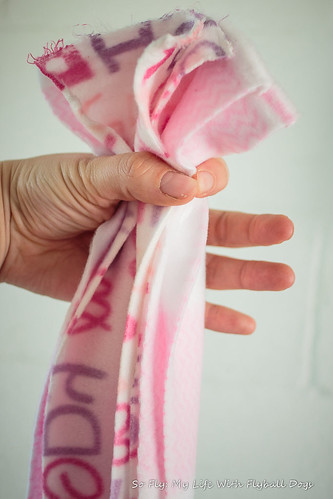
And now, the flyball pictures!

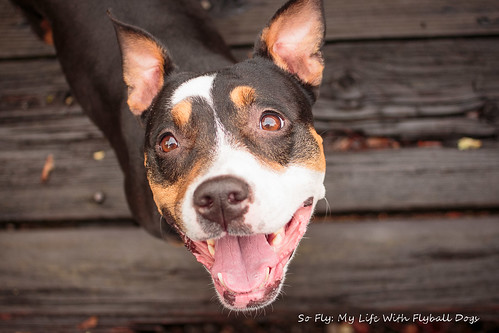
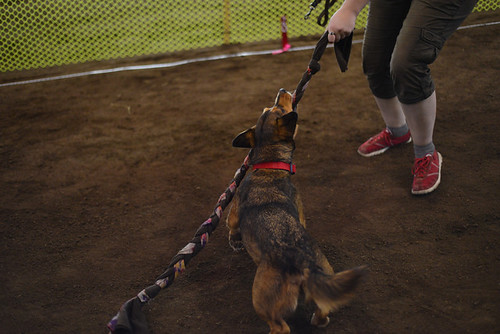
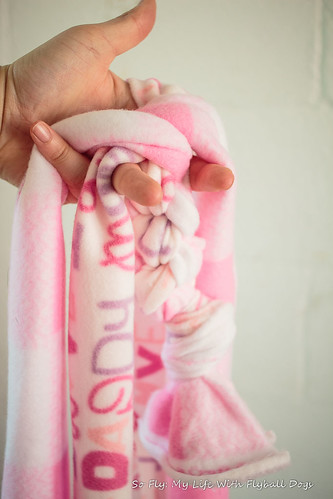
This one is Pallo tugging like a maniac. The tug in flyball is used as a reward at the end of each run. (Check out the tug making tutorial I posted yesterday.) Some people use food or a ball or other toy instead, but I prefer to tug with my dogs. The tug also acts as a way to control where the dog is- if the dog is on the end of the tug, they aren't rerunning themselves, chasing balls in the run back, or otherwise getting in the way of other people or dogs.

DSC_8263-2647196290-W


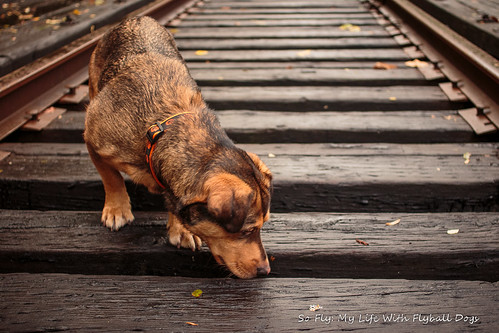
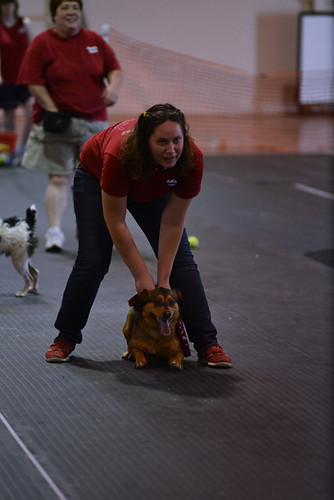
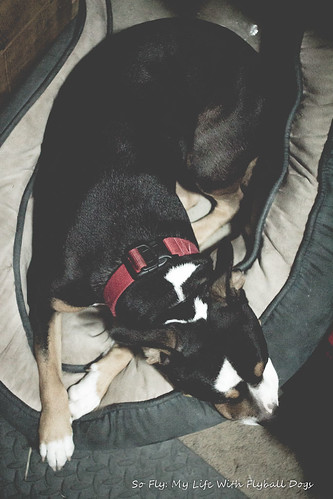
And then this one is of me and Pallo as I am releasing him to run. I used to launch him off of my lap, with me kneeling and his back legs up on my hips. But I decided he was tripping too much from that position, and went to releasing him from a standing position. You can see that he crouches down, almost laying down, and then gets very amped before being released.

DSC_6160-2635325390-W


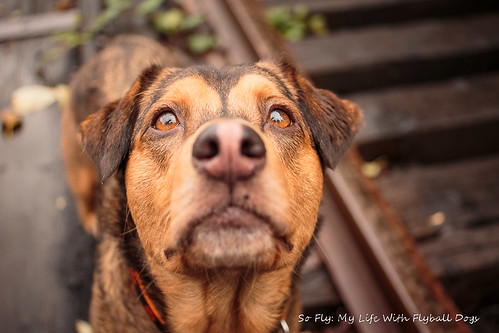
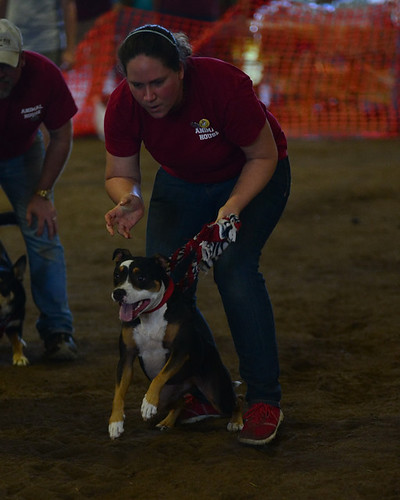
For comparison, here is Koira being release by the same method, where I just stand over them holding their collar until I release them. While Pallo crouches down and gets amped, Koira tends to rear up and look straight up into my face, then almost bounce forward. Unfortunately, it makes for very irregular start times since the amount of bounce changes each time. Because of that, I am working on finding a different, more effective starting method for the two of us.

DSC_1098-2771530939-W


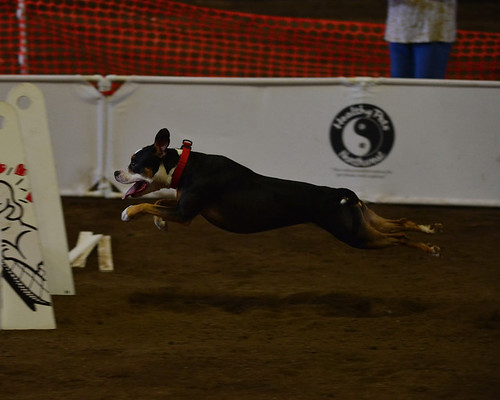
Koira really flattens out when jumping, but certainly clears the jumps with room to spare. Our agility instructor (did I mention that we took an agility class?) said that Koira jumps too flat. I think it is probably because of our flyball practice. And I like her flat jumping style, it makes for a faster flyball dog!

DSC_1112-2771531248-W

With ten feet between each jump, Koira can easily single stride (only touch the ground once between each jump). She does great with extending those back legs out to keep from hitting the jumps with her feet. And I just love the front foot partially tucked in, because it is adorable.

DSC_0770-2771525889-W


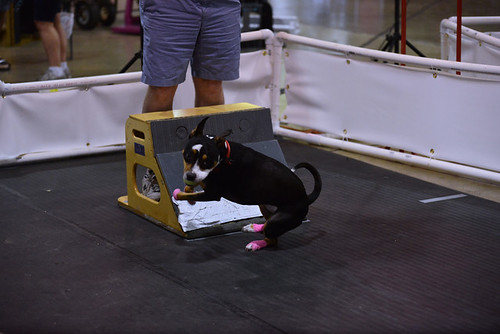
And then, a box turn picture of Koira. Unfortunately, she doesn't really have much of a box turn in this picture... Neither of her back feet ever actually touched the box during this turn, which I am not too fond of. But, if this is what her turn is going to be like, at least I get to play with my dog, and at least she gets to have fun.

DSC_6098-2635323164-W


In any case, I'm super thrilled with all these pictures. Memories are so much better when you have pictures to look at to bring them to mind. It also makes me want to take pictures at the tournament next week. I've been really holding back on taking pictures at flyball tournaments for a while, both because I've been busy and because I just wasn't enjoying it that much. So many people take advantage and just assume someone will take great pictures of their dog and give them to them for free, and it was getting on my nerves (especially after I spent a lot of money on a new camera and a new lens this past spring). But, I enjoy taking pictures, and I think I'll try to get some more of them at this next tournament.

All photos shown in this post were taken by David Eastman, and were shared on this blog with his permission after I purchased digital copies for personal use.

Friday, September 20, 2013

FitDog Friday: Tug DIY

Almost two years ago, I shared this brief DIY tutorial on how to make a fleece tug toy. I still use that method to make most of the tug toys I use with my dogs, though I often vary it to make a spiral pattern instead of a square. This past weekend, I ended up going through five tugs for Koira. Some of them just got so nasty from the dirt and dog slobber combination that I threw them away. Others ended up being sliced up by Koira, who apparently has a new habit of chewing her tugs apart (for the first time in her life!).

Going through 5 tugs in a weekend made me want to learn a quicker way of making new tugs. A team mate of mine has a dog who goes through a tug about every 2-3 races, and she uses a four strand braid rather than a four strand weave like my previous tutorial. So this morning, I set out to teach myself how to make them, and decided to do a tutorial for you guys as well.


First step with any tug project is to cut up your fleece. I like to cut it into 4-5 inch wide strips, as it makes the final product beefy enough to give the dog a good grip. Using a straight edge and rotary cutter makes the entire process much faster, but you can of course use scissors as well if that is all you have. I cut up enough strips for at least a few tugs at a time so I don't have to pull the cutting mat back out all the time.

Tugs-9366
Piles of fleece to cut

Tugs-9367
Using a straight edge, rotary cutter, and cutting mat to cut fleece strips

Tugs-9369
A pile of fleece strips once they are cut

Then, separate out four strips. Each of these is just the width of a piece of fleece. I find it gives a decent length tug, but you can cut fleece lengthwise for longer tugs as well. I like to use two sets of two matching fleece strips. The picture below has two lengths of pink plaid fleece, and two lengths of a pink and dark pink valentine fleece. You can use any different colors, or all the same, I just find it is easier when learning to use sets like this.

Tugs-9390
Four strips of fleece; two are pink with writing, two are light pink plaid

Next, tie a knot in your four strips as near to one end as possible.

Tugs-9391
Tie your knot in the end

Then, separate out the different kinds of fleece so the matching strips are opposite each other. You may have to manhandle them a bit right next to the knot to get started, but it will look fine later.

Tugs-9392
You kind of have to force the strips into this position right next to your knot when starting out, but they will look fine once you start braiding them

Now, you braid them all together. The easiest way for me to do it was to do each matching set at a time. I would take the top strip down towards me, across the knot, and to the right of the matching strip. Then take the other matching strip up towards the top and to the left of its matching strip. It should look something like this.

Tugs-9393
Each of the pink plaid strips flipped over. The one that was on the top is now on the bottom to the right, and the one that started on the bottom is now on the top to the left

Tugs-9394
Another view of the strips. This one shows how I like to separate the strips out with my fingers while braiding, and a bit of the started four strand round braid

Then, cross the next pair, flipping the one on the right to the left and to the top of the other one, and then the one on the left flips to the right and on the bottom. You can pull them tight as you go or leave them loose. This one was done pretty loose.

Tugs-9395
I apparently didn't get any pictures of flipping the strips with writing on them, but it is basically the exact same thing, but side to side instead of top to bottom.

Just keep repeating until you get close to the end of your fleece strips, then tie a knot in the end like you did at the beginning. And boom, fleece tug toy.

This is the first one I did. I pulled it tight sometimes, and sometimes was putting the fleece strips to the wrong side of each other. Which means the final product is a bit random in color and kind of lumpy. It is still perfectly useable, though.

Tugs-9398
You can see this one is a little wonky in size and pattern, but it is still just as usable.

And then, here is all four tugs I was able to make using that pile of cut fleece you see up top.

Tugs-9399
Different width strips and different types of fleece, as well as how tight you pull the braid, will change how thick the final product is.

Tugs-9400
Big handful of tugs. 


Hopefully, since we practice on mats and are running on mats at our next tournament, these four tugs will last for a little while at least. You can kind of get an idea of the length of them in this picture. New like this, each tug reached a bit above my waist from the ground. They will stretch out with use though as well, but they start out much longer than the four strand weave style tug in my previous tutorial. You can of course make them shorter or longer by starting out with shorter or longer fleece strips. I like the nice long tugs for flyball, since it gives my dog a large visible target when recalling.